This is the second part of the series on Google Kubernetes Engine (GKE) Cost Optimization. In this article I’ll explore the bin packing problem in Kubernetes with special reference to GKE.
A DataDog report from November 2023 notes that:
Over 65 percent of Kubernetes workloads are utilizing less than half of their requested CPU and memory
Underutilization seems to be common in many Kubernetes deployments. The report goes on to say:
Organizations are running into these challenges due to a lack of compatible or available cost optimization tools
However, there are plenty of tools that exist, both commercial and otherwise. Where is the gap?
Resource Requests and Limits
Resource requests are a declarative way of specifying how much CPU and memory your pod might need. The Kubernetes scheduler distributes pods across nodes based on these numbers.
The bin packing problem is about the optimal distribution of pods across available nodes while minimizing resource wastage.
It is important to understand how bin packing differs from right-sizing your pods. Right-sizing is determining and specifying the correct CPU and memory that your pods need. After you have the correct resource requests, bin packing is about fitting these into the available nodes.
If you have not right-sized your pods, your deployments will end up requesting more than they need, and Kubernetes will reserve that amount, leading to wastage. Bin packing is one of the steps in optimizing your Kubernetes resource usage.
Google’s “State of Kubernetes Cost Optimization Report” from last year collected anonymized data from GKE clusters:
Cluster owners that focus on addressing discount coverage or cluster bin packing without addressing workload rightsizing may find that they have to re-do their efforts when their workloads become properly sized
So why is bin packing not straightforward?
Heterogeneous Resource Usage
The resource requirements of your apps will fall into one of these categories:
-
High CPU and low memory
-
Low CPU and high memory
“High” and “Low” are relative here - it is easier to think of ratios for ease of discussion.
E.g. 2 CPU/16GB is 1:8 - can be put under high memory.
In an ideal, unchanging world, your applications would look like this:
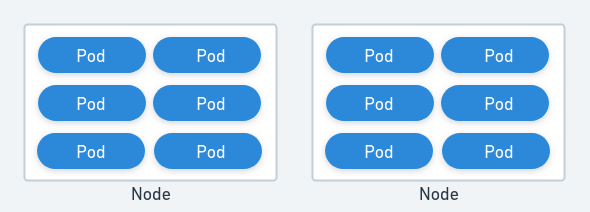
But this does not reflect the real world. You probably have many microservices, each one as a container inside a pod, and they have different resource requirements. Trying to fit different sized pods into a node will lead to some resources being unused, and wasted.
The complexity of your resource requirements increases with the number of microservices. What should be the instance size of your node pool or pools? And how do you pack such widely different apps into your node pools?
Let’s look at common approaches.
A Single Node Pool
Create a single node pool with x CPU and y memory. This will only work if all your microservices have identical resource requests.
Node pool’s instance CPU = n * pod_cpu_request + some buffer for bursting, system pods, and the node’s OS
Node pool’s instance memory = n * pod_memory_request + some buffer for bursting, system pods, and the node’s OS
Where n is the number of pods you want to run per node.
For heterogeneously sized pods, this model will waste resources.
A Predefined Set of Node Pools
Define a specific, “allowed”, set of ratios of CPU and memory for your pods and map those ratios to your node pool instance’s CPU and memory.
E.g. Define
High memory ratio as CPU : Memory = 1:8.
Pods with this ratio will go into a pool with instances whose CPU:Memory ratio is also 1:8.
Medium memory ratio as CPU : Memory = 1:4.
Pods with this ratio will go into a pool with instances whose CPU:Memory ratio is also 1:4.
And so on.
How do you enforce these across your services and teams? If you have a single way to deploy (and you should), you can hook into your deployment system and intercept requests. As part of a pre-deployment step, it’s possible to calculate the pod’s ratio and set its node affinity in your deployment descriptors to push it towards the correct pool. Any deployment attempts with ratios outside the allowed list will be rejected.
If you use Helm, you can write a post-renderer to modify the YAML on the fly.
This gives you the most flexibility.
Mix of Common and Dedicated Node Pools
Some applications might require special hardware like local SSDs which have to be attached explicitly to the nodes, and configured, while creating them.
Create dedicated pools for these pods and pin them using node affinity, and use shared, predefined pools (see the previous point) for everything else.
GKE Autopilot
If you run your GKE cluster in Autopilot mode, GKE manages the entire cluster and automatically sets up node pools under the hood based on your resource requests. This is supposed to lower costs due to better bin packing. However, using Autopilot stops you from changing certain settings
- Regional clusters are mandatory.
- The node OS is fixed.
- Local SSDs are unsupported - as of this writing.
- You can run a max of 32 pods/node, versus 110 pods/node in Standard mode.
- Cloud logging and monitoring cannot be turned off even if you have your own.
- Your pod’s CPU/memory ratio has to be within predefined ranges, otherwise Autopilot changes it. Compare this to the “Predefined set of node pools” option above.
I am not aware of any large-scale, real world comparative study between the standard and autopilot modes in GKE in terms of cost and efficiency. It would be interesting to see how it deals with complex architectures.
In conclusion, there is no one-size fits all solution. There is a gap here and different parties are trying to fill it with different approaches.
Integrated solutions - like Autopilot - from managed Kubernetes vendors can work for simpler, well-defined workloads which need minimal tuning. For complex architectures, right-sizing your applications - which is a separate topic in itself - followed by standardized bin packing efforts, which call for more control over your cluster, seems to be the better choice.
To complete your cost optimization efforts, add temporal downsizing and vendor discounts to the mix. I’ll address these in future posts.
Check out the first part of this series.
Thank you for reading, and do reach out via comments or on Twitter if you want to chat or share your thoughts.